Thursday, 16 June 2016

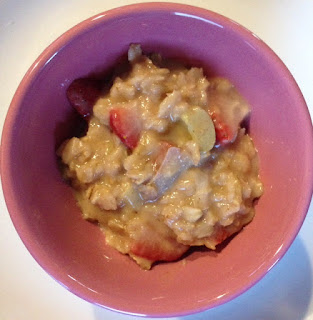
Strawberry Rhubarb Oatmeal

Summer is finally here and we are loving it!  For the past few weeks my garden has really gotten going, so I've had lots of fun as Mini Muffin has enthusiastically observed our seeds sprouting and growing into every bigger plants.  Not only are the veggies coming along nicely, but my rhubarb is up and producing like mad!  It's a good thing because I certainly do enjoy rhubarb!

While searching for ways (other than delicious pie) to use rhubarb, I came across the idea of rhubarb oatmeal on eatingwell.com and just had to give it a try.  So this morning, we broke from our usual mid-week breakfast routine and tried something new - Strawberry Rhubarb Oatmeal.  Yum!

Strawberry Rhubarb Oatmeal
Strawberry Rhubarb Porridge

1 1/2c 2% milk
1/2c orange juice
1c old fashioned rolled oats
1c chopped rhubarb
1/2 tsp cinnamon
pinch salt
1c chopped strawberries
1tbsp maple syrup

1.  Chop rhubarb into ~1cm pieces (or finer if making for baby).
2.  In a medium saucepan, combine milk, orange juice, oats, rhubarb, cinnamon and salt.  Bring to a boil over medium heat, stirring occasionally.
3.  Reduce heat until gently bubbling and cook, stirring often, for three minutes.
4.  Add chopped strawberries and cook an additional two minutes or until most liquid has absorbed.
5.  Cover and let rest for five minutes.
6.  Stir in maple syrup, adding additional to taste if desired.

Makes ~3 cups

Little Smiling Man and I both enjoyed having oatmeal with a sweet/tart twist for breakfast.  Since strawberry rhubarb is a common combination the taste was familiar, but somehow completely new being in oatmeal form.  It definitely made for a delicious and unique dish!

The oats held their shape very well, so after having some from a spoon, Little Smiling Man decided to turn it into a messy finger food and enjoyed feeding himself.  For younger babies, I would consider puréeing the final product, but for older babies ready to explore texture this is a great dish! 

I also took some to work for my afternoon snack.  It wasn't quite as satisfying for my sweet/tart cravings as rhubarb pie, but it was definitely a better choice and kept my energy levels steady through until dinner. 

With more rhubarb ready for harvest, I suspect there'll be some more recipe experimentation this weekend.  Stay tuned for more rhubarb goodness!
Monday, 13 June 2016

Fitting It All In

Life has become so busy in the last few weeks!  With my husband working out of town during the week, two littles and a home to care for, and work in full swing it doesn't feel like there's room for much else.  Or so I thought... until I volunteered for the daycare board of directors, and started a fitness challenge at work.  Now I really think there isn't room for much more!

The fitness challenge in particular seems to have taken over my life.  It's a 100 day step count challenge, run by an external company.  And does the company ever know what they're doing!  It doesn't matter what motivates you, they have something to spur you on.  There are lifestyle scores that go up as you walk more, there are targets and challenges.  There's your team egging you on, and your personal stats versus the other 340,000 people participating, your team stats versus all other teams, or versus your organisation.  Seriously.  It's taking over my life.  All we talk about at lunch are steps.  We're all starting to move towards our target weights because we're so busy walking we don't have time to snack.  Literally, I'm usually a terrible evening snacker, and now I hardly have a bite after supper because I'm busy walking.  And walking.  And walking.  The amazing thing is that I'm much more active than I was, having nearly doubled my daily average in the last twenty days.  Hooray!  I am absolutely loving it, and feel great about my new activity levels.  I especially love that after 100 days, being active will be my new norm and I'll be able to dial it back to something a bit more sustainable but decidedly more active than my before challenge state.  It is however a bit daunting to think about how much stepping the next 80 days holds...

The thing about the fitness challenge that has been most challenging is fitting everything in.  I really want my weekends to be about family time, but Mini Muffin is too old to want to ride in a stroller for long and is too young to go any great distance on foot or bike.  Running around in the backyard or park help, but really only contribute a couple of thousand steps to the total (which doesn't get me where I need to be).  And once the kids are in bed, I have the opportunity to zip out for a walk or run leaving my hubby at home, but I also want to spend time with him.  Fitting it all in is just so tough!

Yesterday however, I came up with a master plan that did fit everything in.  My husband needed new running shoes, and the store was in an area of town we don't often go to.  We all went along, and when we got there I popped Little Smiling Man into the stroller and sent Mini Muffin into the store with Daddy.  Little Smiling Man and I spent the next half hour or so walking, and met up with Mini Muffin and Daddy at the end of a trail up the road.  We then went on a gravel, wooded path and enjoyed hearing the wind in the trees without cars around.  Mini Muffin ran ahead, looked at all sorts of things that interested her, and we all talked and enjoyed ourselves.  When she got tired, she got to ride on Daddy's shoulders.  At the end of the walk, we all piled back into the van and headed home.  So, all in all; my husband got his runners, Little Smiling Man got a stroller nap in, Mini Muffin got a nature walk, fresh air and exercise, we all got family time, and I got 6800 steps! 

It definitely took some planning, but working to fit it all in was so worthwhile!  Now, if you'll excuse me, I have another couple thousand steps to get in before bed...

Monday, 6 June 2016

Toddler Friendly Juicer Recipe!

So, we're back from our weekend in Ottawa!  It was a lovely weekend, and my sister's wedding was just beautiful.  The kids did a great job as flower girl and ring bearer, and we managed to keep them and their clothes clean and uncreased until pictures were over!  Once they didn't need to be spotless, they enjoyed playing outside at the venue, dancing, and generally just being their wonderful selves while the reception unfolded around them.  I can also say from experience that just like it takes a village to raise a child, it definitely takes a village to get through a wedding (that happens during nap time) and a reception (that starts at bedtime) with one and three year olds.  I am so grateful for my family and my sister's inlaws for their help, patience and willingness to have fun with my little ones.  It really was a great day for everyone.  As a cute side note, Mini Muffin refers to Little Smiling Man's tux as his "bear suit" since he was the ring bearer!  Adorable.

Now that we're home, I wanted to share a juice recipe I tried for the kids tonight.  I don't normally share recipes requiring special equipment (i.e. a juicer), but when Mini Muffin's exact words were "This juice is delicious.  I really like this juice!", how could I not share?

Romaine - Apple - (and other stuff) - Juice


2c roughly chopped romaine lettuce
1/2 cucumber
2 stalks celery
2 apples (I used Macintosh)
1 orange (or 1/2c orange juice)


1.  Add all ingredients to juicer, starting with romaine and ending with apples.
2.  Stir in orange juice.
3.  Serve cold

Makes 4 toddler servings, or 2 adult servings.

Source: Juice Recipes for your health


In all honesty, the only reason I tried this recipe was because I happened to have all the ingredients in the fridge.  Who knew it would be so tasty?  Or that Mini Muffin would drink her entire serving and ask for more?  I must say, it was a pleasant surprise, as well as a great and refreshing way to round out our dinner!

Thursday, 2 June 2016

Vanilla Pear Dessert Muffins

Last weekend, I had marvelous visions of using up a few pears to make a delicious looking pear upside down cake that I saw on Guilt Free Sparrow.  That idea was derailed by the large quantities of fresh rhubarb in my garden that were just begging to be made into a pie; and so I found myself with two firm but very ripe pears looking to be used up.

I found a yummy looking pear muffin recipe at allrecipes.com and made my usual tweaks to suit my tastes.  I kept this version sweet, so it's less for the kids and more for grown ups with a hankering for a little treat.  I hope you'll enjoy them; I certainly did... apparently I was so busy enjoying them that I forgot to take a picture...

Vanilla Pear Dessert Muffins

1 1/2 c whole wheat flour
1 tsp gluten flour *
2/3c white sugar **
1 1/2 tsp baking powder
pinch salt
1/2 c plain 2% Greek yogurt
1/2 c oil of choice (I used vegetable)
1 egg
3 tsp vanilla extract
2 pears, peeled and diced

1.  Preheat oven to 375F and prepare muffin tin (line with muffin cups or grease pan).
2.  In a large bowl, combine flours, sugar, baking powder and salt.
3.  In a smaller bowl, combine yogurt, oil, lightly beaten egg and vanilla.
4.  Add the wet ingredients to the dry, mixing until just combined.
5.  Fold in diced pears.
6.  Divide batter among muffin cups and bake 22-25 minutes, until golden brown.

Makes 12 muffins

* Alternatively, substitute 1/2c all purpose flour for whole wheat (so 1 c whole wheat flour and 1/2 c all purpose flour).
** You could probably cut this down to 1/2 c and these muffins would still be a sweet and tasty dessert!

My muffins are not generally sweet, so these dessert muffins have been a nice change from the ordinary!  I packed about half of them into the freezer so that I'll be able to enjoy them at their prime in the future when I'm looking for a quick and easy something sweet. 

I think I'll leave it there for today - we're leaving in the wee hours tonight/tomorrow to drive to Ottawa for my sister's wedding, and there's a bit more to be done between now and then.  It'll be a fantastic and busy weekend with Little Smiling Man as Ring Bearer, Mini Muffin as Flower Girl, and myself as Matron of Honour.  I'm really looking forward to it, as well as a bit of downtime afterwards! 

Monday, 30 May 2016

Savoury Mediterranean Pie

I am the first to admit that pastry is my baking nemesis.  Don't get me wrong, I love pie and even make some pretty delicious fillings.  But, I just can't seem to get pastry right; it falls apart, or it's too sticky, or it's crumbly, or it's tough.  I'm pretty sure that after each failed attempt I over compensate the next time, which results in the next pastry fail.  And so I'm completely reliant on my husband (or anyone else that happens to be around) to make pastry for me.

Yesterday morning my husband made me pastry for two, two crusted pies.  Hooray!  I'd been putting off making pies for a couple of weeks, and finally we found an opportunity for pastry making.  Funnily enough, I might as well have made the pastry myself in the end.  It was a very rare baking failure for him and was too fragile to roll.  Let's blame it on the humidity.  I forged ahead anyhow, hand pressing it together for the bottom crust, and doing my best to piece together the top crust.  My pies looked... rustic.  Sure... let's go with that!

By the time I was done I had two delicious pies cooling on the counter, and looking both odd and delicious at the same time.  The first was a tart and sweet pie with rhubarb fresh from the garden, and a tried and true Betty Crocker recipe.  The second was a savoury and quiche-like recipe that my mom has been making since I was a little kid.  Since I daresay it'll be a while before I attempt pastry again, this seems like the perfect time to share my favourite Sunday lunch - Mediterranean Pie.

Mediterranean Pie

Pastry for a two crust pie (uncooked)
8 oz Black Forest ham, thinly sliced
4-6 slices Swiss Cheese
1 tbsp butter
1 clove garlic, minced
1 small yellow onion, chopped
1 bag fresh spinach
1 red or yellow pepper
4 eggs

1.  Preheat oven to 375F.
2.  Lay bottom pastry in pie plate, and place ham over it in an even layer.  Top with cheese.
2.  In a frying pan, melt butter.  Sauté garlic and onion until onion is translucent.
4.  Add spinach to frying pan, and toss until wilted.  Transfer spinach to pie plate, in an even layer over the ham and cheese.
5.  Thinly slice red pepper and place in an even layer over the spinach.
6.  Lightly beat eggs, and pour over peppers.  Top with pie crust, cutting slits for steam to escape.
6.  Bake for 45-50 minutes, or until pastry is lightly browned. 

Serve warm; salad makes a great side.

Mediterranean Quiche
Cross-section - lots of yumminess between two crusts!

Today, happily there was leftover Mediterranean Pie for lunch, and rhubarb pie for dessert after supper!  A delicious treat on both counts!

Tuesday, 24 May 2016

Zucchini Pumpkin Quinoa Muffins

What a fantastic long weekend we had!  Having spent it working and playing outside, as well as getting a few things done inside, I came out of the weekend on an absolute high.  We had so much good quality family time, were active all weekend, and got so much done!

One of my less fun indoor tasks for the weekend was cleaning out the cabinet I use to store serving dishes, wine glasses and recipe books.  As I was going through my clutter of assorted recipe books and cooking magazines, I realized how nice it is that my focus in cooking hasn't changed much over the years.  I'm as much about tasty, simple and healthy food today as I was ten years ago.  This makes it really interesting to go through all of my recipes, as I tend to find forgotten, delicious gems.

The recipe I'm sharing today literally fell into my lap.  As in I was sitting on the floor, pulling down recipe books, and a recipe that I'd printed out years ago but never tried fell from the stack and landed in my lap.  When I read it and realized that it incorporated zucchini and a very ripe banana (of which I had one of each that needed to be used up) as well as quinoa (which I love), I knew it was meant to be.

Thanks to the footer on my print out, I was able to trace where it came from.  The Healthy Foodie created this recipe, and when I browse around their website they seem to have created many more tasty creations in the years since! 

Naturally, I put my own tweaks to it, and the result is perfect for little ones.  I find these muffins hearty and moist, and both lightly sweetened and spiced.  Best of all, they have no added sugar, lots of veg, and all the goodness of quinoa.  Quinoa is a grain that I'd really like my kids to eat more of, but I haven't had much luck at incorporating it into finger foods until now.  No matter how well formed and sturdy my efforts seemed to be, they end up disintegrating into a mess of individual grains as soon as little fingers grasp them.  Happily this recipe bucked that trend so I know it's possible.  If you have an awesome recipe for quinoa based finger foods, comment below please!  I'm interested!

In terms of sweetness, I kept my batch plain and found the flavours to be subtle but pleasant.  If you like your muffins a little sweeter or your flavor profiles more complex, consider adding a bit of maple syrup, raisins or both to your batter. 

Zucchini Pumpkin Quinoa Muffins
Zucchini Pumpkin Quinoa Muffins - fresh out of the oven

2c whole wheat flour
1 tsp gluten flour (optional)
1 1/2 tsp baking powder
1/2 tsp baking soda
2 tsp cinnamon
1/2 tsp ground ginger
1/4 tsp nutmeg 
1c zucchini, grated (about 1 medium zucchini)
1c pumpkin purée
1c cooked quinoa
1 large, very ripe banana
2 eggs
2/3c 2% milk

Optional:
1/3c raisins and/or 2tbsp maple syrup

1.  Preheat oven to 425F and line muffin tins.
2.  Blend first seven ingredients in a large bowl, set aside.
3.  Grate zucchini, and squeeze away excess water.*
4.  Combine zucchini, pumpkin and quinoa well.  Then, add well mashed banana, eggs and milk.  Include maple syrup in wet ingredients if desired.
5.  Pour zucchini mixture into bowl with dry ingredients and stir until just combined.  Add raisins if desired.
6.  Divide among muffin tins, and bake for five minutes at 425F.  Then, decrease temperature to 375F and bake another 17-20 minutes until lightly browned and an inserted toothpick comes out clean.
7.  Enjoy warm or cooled, they're lovely both ways!

Makes 16-18 muffins

* I've only recently come to appreciate the difference in final texture that squeezing moisture out of zucchini lends to my baked goods.  I simply transferred my grated zucchini to a clean tea towel, and squeezed it out over the sink.  It's amazing how much liquid a zucchini contains!

Little Smiling Man had one with dinner and his narrative was along the lines of "Harum, mum mum mum mum!", which I think means "Mmmm, mmm, mmmm"! 

Monday, 23 May 2016

Ring Around the Tub Banished... Naturally!

Happy Victoria Day!  This long weekend the weather has been so summer like.  And with summer comes lots and lots of outdoor playtime, sunscreen, gardening and REALLY dirty kids!

We've been spending our weekend almost exclusively outdoors.  We've prepped and planted our flower and vegetable gardens, played in sand and water, run around for some backyard soccer rocker, and brought out all of the summer outdoor toys.  It's been fantastic, and we've all benefited from some sunshine and fresh air.  Last night both kids were fast asleep by 7:20, so my husband and I even got some time to reconnect and enjoy each other's company before it was time to turn in.

Now, to the topic of this post.  On Saturday, after gymnastics and a few errands in the morning, we spent the afternoon outside.  There was lots of sunscreen, digging in the garden, play in the sand table, and general running around in the grass and dandelions.  Both kids were dirty by dinner time.  Really dirty.  I took them straight upstairs and dumped them into the tub before dinner.  Sunday morning as I got myself ready for the day, I noticed that my previously clean tub had a pretty serious ring around it.  A brown, greasy, gungy ring of sunscreen and dirt.  I rubbed at it, and it wasn't going anywhere.  I showered and poked at it while I was in there, and it didn't budge.  Once I'd finished I took a picture of my gubby tub... as you do...

Ring around the tub
Next, I grabbed my favourite cleaning agent - plain white vinegar.  I decided to give it a go, and see how a product without the usual chemical cocktail found in most cleaning products would stand up to this mess.  I dampened a rag, then dipped it in vinegar.  I gently rubbed it along the ring the whole way around the tub.  By the time I got around the tub, I figured it probably had had enough time to do its magic so I just ran the cloth around the tub one more time.  I used medium pressure, but certainly wasn't scrubbing or working too hard.  The ring appeared to have gone, just like that!  I ran my finger along it and it was no longer grimy or greasy, and there wasn't a trace of dirt.  So, I gave it a quick rinse and was done, without touching anything but a cloth and my trusty bottle of vinegar.

After!  Sunscreen and dirt ring banished!
With summer just beginning, I'm happy to have found this solution now.  I suspect there will be many more sunscreen and dirt bathtub rings in my future!

Thursday, 19 May 2016

Random Laundry Tip

Last weekend when we were out and about doing errands, when the backseat suddenly got quiet.  Both Mini Muffin and Little Smiling Man had fallen asleep in their carseats!  We continued about our errands, with either my husband or I darting into the store while the other waited in the car with our sleeping angels.  During my wait in the car, I pulled out an issue of Canadian Living I've been keeping in the center console for just such an occasion.  It was nice to just relax and read in the car for five minutes... which probably speaks to how hectic life has been lately.

Fast forward, and I'm at home desperately trying to catch up on laundry.  My laundry philosophy is quite basic - keep on top of it, and keep it simple.  My wash routine is pretty standard (e.g. laundry soap and a wash cycle appropriate for the level of dirt), and for drying I either line dry or just put the clothes straight in the dryer.  I've never been big on fabric softener, but used to use dryer sheets with every load.  I decided to stop using them in the lead up to Mini Muffin's birth; I wanted to avoid using any products that could irritate her skin, and I also wanted to reduce the chemicals she'd be exposed to.  I loved the smell dryer sheets gave my laundry, but have no idea what goes into making that nice scent... and I probably don't want to know!  As an added bonus, eliminating dryer sheets has also gotten rid of the gradual plugging of my dryer's lint trap with whatever that waxy substance on them is.        

Once I'd stopped using dryer sheets the only real differences I noticed were that our laundry now smelled like beautifully clean nothing, and at times was full of static.  I've been living with static for a few years now, but it's been getting worse lately.  I suspect my husband's new work socks are the culprit, but who knows?  So, on Sunday night as I pulled apart two pieces of clothing crackling with static, I decided to try a tip I'd read in Canadian Living.  I searched my closet and found the one wire clothes hanger I'd missed discarding last time I'd cleaned it out.  Then, I held up each piece of clothing and ran the clothes hanger up and down it.  Voila, no more static!  It's that simple.  

The clothes hanger trick is also a great tip for travelling.  I know I've often found my dress and nylons to have more attraction to each other than I'd like while staying at hotels.  I've tried to deal with it with everything from rubbing a dryer sheet on my nylons, to spritzing my legs with hairspray.  This seems like a much easier solution, contact with a strip of metal to diffuse the charge, and you're good to go... static free!

Needless to say, that wire clothes hanger is now carefully stored at the front of my closet for future static eliminating duties.  

Sunday, 15 May 2016

Easy Mommy Win - Apple, Broccoli, Green Bean Purée

As I've previously mentioned, my husband is spending weekdays out of town.  We survived our first week with the help of my mom, but I freely admit that I wasn't feeling like my usual organised and (somewhat) on top of things self!  With being away part of the weekend, I didn't have a chance to do my usual meal planning/grocery shopping/food prep routine.  Then, with my husband being out of town I really didn't have a chance to catch up.  While we ate very well thanks to my mom, I really noticed the difference in the extras - my work lunches, and breakfast and snacks for the kids.  For one, my stash of healthy muffins in the freezer ran out, and on Friday I realised that the kids didn't get as many veggies in as they normally would.  Cue the mommy guilt.

This weekend, I've been trying very hard to get back on top of things.  The washer and dryer have been going... and going... as have my steamer and oven.  My goal is to have a week of well planned, minimal prep dinners, and lots of good, nutritious foods for the kids and I to enjoy for breakfasts, lunches and snacks.  While I was looking for recipes I came across a Baby FoodE recipe I'd bookmarked but never tried.  Their recipe for Apple + Green Beans + Broccoli Purée is great - no tweaks required! 

Now, I have never had much luck with purées.  No matter how carefully I'd select delicious, fresh, local produce, steam to perfection, and purée them just so, my kids just never seemed to enjoy my purées.  Store bought baby food pouches, they'll suck back in the blink of an eye on the other hand.  I was taking it pretty personally... until I really looked at the ingredient list.  While I was buying products with things like broccoli, spinach and kale in the name, the veggies were actually not at the top of the ingredient list, so my kids were getting mostly fruits (and some veggies) when they'd polish one off.  So, I decided to get more creative with my purées, and take a cue from baby food manufacturers and incorporate more fruit.  In my searches to try and find the right balance between fruit and veg, this recipe came up, and I'm so glad I bookmarked it for future use! 

Green Applesauce
Apple, Broccoli and Green Bean Purée

2 sweet apples, peeled and chopped
1/2c broccoli flowerets
1/2c chopped green beans

1.  Place chopped apples, broccoli and green beans in a steamer and steam until tender.
2.  Purée to desired consistency, adding water from the steamer as required.  (I added 3/4 c water, and used my regular blender.)

Makes about two cups


This purée reminds me a bit of my Orange (Carrot) Applesauce, and both kids are really enjoying it.  For Mini Muffin, who as a toddler/preschooler is well out of purées, we've framed it as Green Applesauce, much like the Orange Applesauce she loves.  She was hesitant, but we got there in the end.  I'll call this one an easy mommy win, and seeing Mini Muffin actually consume broccoli and green beans makes it all the better!!!

Friday, 13 May 2016

Celebratory Sweet Potato Waffles

Today is Mini Muffin's third birthday!  Everyone says it, but while the days can be long, the years truly are short.  Suddenly my little first born baby has grown into a little girl who is more preschooler than toddler, and is absolutely beautiful both inside and out.  She makes me laugh every day and makes me want to be the best mom I can be.  She's full of love, energy, joy and wonder, and I hope those characteristics only grow stronger with age.

This morning she woke up with a big smile on her face; she's been asking if it's almost her "Happy Day" since July, so it's been a long time coming.  After I finished singing Happy Birthday, her first question was "Where's my cake?".  Luckily I'd thought ahead, and had a great alternative available for her... waffles for breakfast!

My husband makes waffles almost every weekend, usually with Mini Muffin as his helper.  His version involves stiff peaked egg whites to make them light and fluffy and oh so delicious.  While I love them, I don't love the effort and extra dishes their preparation entails.  So last night I set about making my own waffle recipe and included sweet potato.  I will admit that with my husband out of town and my mom (who was staying with us to help) having gone home yesterday, I felt like a superstar when I got the kids to bed, did all my cleaning/straightening while the sweet potato was steaming, prepped the wet and dry ingredients (so all I'd have to do was combine them and cook in the morning), and still got to bed in good time.  This morning, I got up 15 minutes early to make sure I had time to get both myself and the waffles organised before my early rising Little Smiling Man got up for the day.  It all came together perfectly, Little Smiling Man "slept in" and I managed to take the last waffle out of the iron just as Mini Muffin woke up.  Hooray!

My sweet potato waffles are quite dense and slightly sweet, and as such I found them very satisfying.  I even took a left over waffle with me to have as a snack at work - it was tasty even unheated and without toppings!  As an added bonus, the texture of these waffles stands up really well to little hands so they make a great finger food.

Sweet Potato Waffles
Healthy Waffles
Staying warm in the oven until the Birthday Girl awakes!


1c mashed sweet potato
1c 2% milk
1 egg
2 tbsp maple syrup
2 tbsp melted butter (optional)
1 1/2c all purpose flour*
2 tbsp baking powder
1 tsp cinnamon
1/4 tsp ginger
1/4 tsp nutmeg
pinch salt

1.  Peel, chop and steam sweet potato until soft.  Mash well, minimising lumps.
2.  Combine sweet potato, milk, egg, maple syrup and butter**.
3.   Blend remaining dry ingredients.
4.  Pour wet ingredients into dry and combine to form a thick batter.
5.  Grease waffle iron and cook.  I found a lower heat setting to give fully cooked and lightly browned waffles - setting 2 of 6 on my iron.
6.  Enjoy with butter and syrup, fruit and whipped cream, fruit sauce, or on their own!

Makes 6 waffles

* Whole wheat flour and a small amount of gluten flour could be substituted for white flour; I chose white flour because the sweet potato makes these waffles pretty dense as is.
** In my bleary eyed state this morning I completely forgot to add the butter I'd planned to include - the waffles turned out well without!

Mini Muffin was thrilled at surprise week day waffles!  After I topped them with butter and little bit of maple syrup, she tucked in and I held my breath hoping she wouldn't notice that they weren't "normal" waffles.  Her first response was "Mmmm... mmmm...."; music to my ears! And about four bites in she added:

Mini Muffin: "Did you put cinnamon?"
Mommy: "Yes, I did."
Mini Muffin: "Does Mommy's waffle have cinnamon?"
Mommy: "Yes, it does."
Mini Muffin: "We like cinnamon!" (smiles)

Healthy Waffles
Birthday Breakfast in Progress!
Sweet success to start my Friday morning.  I am one happy momma, and aptly so since as Mini Muffin says, a birthday is a "Happy Day".