Showing posts with label Recipes. Show all posts

Thursday, 16 June 2016

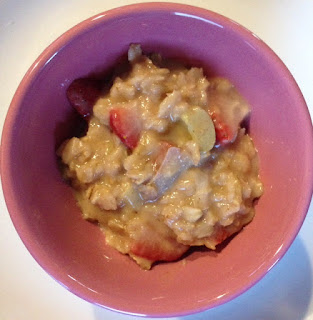
Strawberry Rhubarb Oatmeal

Summer is finally here and we are loving it!  For the past few weeks my garden has really gotten going, so I've had lots of fun as Mini Muffin has enthusiastically observed our seeds sprouting and growing into every bigger plants.  Not only are the veggies coming along nicely, but my rhubarb is up and producing like mad!  It's a good thing because I certainly do enjoy rhubarb!

While searching for ways (other than delicious pie) to use rhubarb, I came across the idea of rhubarb oatmeal on eatingwell.com and just had to give it a try.  So this morning, we broke from our usual mid-week breakfast routine and tried something new - Strawberry Rhubarb Oatmeal.  Yum!

Strawberry Rhubarb Oatmeal
Strawberry Rhubarb Porridge

1 1/2c 2% milk
1/2c orange juice
1c old fashioned rolled oats
1c chopped rhubarb
1/2 tsp cinnamon
pinch salt
1c chopped strawberries
1tbsp maple syrup

1.  Chop rhubarb into ~1cm pieces (or finer if making for baby).
2.  In a medium saucepan, combine milk, orange juice, oats, rhubarb, cinnamon and salt.  Bring to a boil over medium heat, stirring occasionally.
3.  Reduce heat until gently bubbling and cook, stirring often, for three minutes.
4.  Add chopped strawberries and cook an additional two minutes or until most liquid has absorbed.
5.  Cover and let rest for five minutes.
6.  Stir in maple syrup, adding additional to taste if desired.

Makes ~3 cups

Little Smiling Man and I both enjoyed having oatmeal with a sweet/tart twist for breakfast.  Since strawberry rhubarb is a common combination the taste was familiar, but somehow completely new being in oatmeal form.  It definitely made for a delicious and unique dish!

The oats held their shape very well, so after having some from a spoon, Little Smiling Man decided to turn it into a messy finger food and enjoyed feeding himself.  For younger babies, I would consider puréeing the final product, but for older babies ready to explore texture this is a great dish! 

I also took some to work for my afternoon snack.  It wasn't quite as satisfying for my sweet/tart cravings as rhubarb pie, but it was definitely a better choice and kept my energy levels steady through until dinner. 

With more rhubarb ready for harvest, I suspect there'll be some more recipe experimentation this weekend.  Stay tuned for more rhubarb goodness!
Monday, 6 June 2016

Toddler Friendly Juicer Recipe!

So, we're back from our weekend in Ottawa!  It was a lovely weekend, and my sister's wedding was just beautiful.  The kids did a great job as flower girl and ring bearer, and we managed to keep them and their clothes clean and uncreased until pictures were over!  Once they didn't need to be spotless, they enjoyed playing outside at the venue, dancing, and generally just being their wonderful selves while the reception unfolded around them.  I can also say from experience that just like it takes a village to raise a child, it definitely takes a village to get through a wedding (that happens during nap time) and a reception (that starts at bedtime) with one and three year olds.  I am so grateful for my family and my sister's inlaws for their help, patience and willingness to have fun with my little ones.  It really was a great day for everyone.  As a cute side note, Mini Muffin refers to Little Smiling Man's tux as his "bear suit" since he was the ring bearer!  Adorable.

Now that we're home, I wanted to share a juice recipe I tried for the kids tonight.  I don't normally share recipes requiring special equipment (i.e. a juicer), but when Mini Muffin's exact words were "This juice is delicious.  I really like this juice!", how could I not share?

Romaine - Apple - (and other stuff) - Juice


2c roughly chopped romaine lettuce
1/2 cucumber
2 stalks celery
2 apples (I used Macintosh)
1 orange (or 1/2c orange juice)


1.  Add all ingredients to juicer, starting with romaine and ending with apples.
2.  Stir in orange juice.
3.  Serve cold

Makes 4 toddler servings, or 2 adult servings.

Source: Juice Recipes for your health


In all honesty, the only reason I tried this recipe was because I happened to have all the ingredients in the fridge.  Who knew it would be so tasty?  Or that Mini Muffin would drink her entire serving and ask for more?  I must say, it was a pleasant surprise, as well as a great and refreshing way to round out our dinner!

Thursday, 2 June 2016

Vanilla Pear Dessert Muffins

Last weekend, I had marvelous visions of using up a few pears to make a delicious looking pear upside down cake that I saw on Guilt Free Sparrow.  That idea was derailed by the large quantities of fresh rhubarb in my garden that were just begging to be made into a pie; and so I found myself with two firm but very ripe pears looking to be used up.

I found a yummy looking pear muffin recipe at allrecipes.com and made my usual tweaks to suit my tastes.  I kept this version sweet, so it's less for the kids and more for grown ups with a hankering for a little treat.  I hope you'll enjoy them; I certainly did... apparently I was so busy enjoying them that I forgot to take a picture...

Vanilla Pear Dessert Muffins

1 1/2 c whole wheat flour
1 tsp gluten flour *
2/3c white sugar **
1 1/2 tsp baking powder
pinch salt
1/2 c plain 2% Greek yogurt
1/2 c oil of choice (I used vegetable)
1 egg
3 tsp vanilla extract
2 pears, peeled and diced

1.  Preheat oven to 375F and prepare muffin tin (line with muffin cups or grease pan).
2.  In a large bowl, combine flours, sugar, baking powder and salt.
3.  In a smaller bowl, combine yogurt, oil, lightly beaten egg and vanilla.
4.  Add the wet ingredients to the dry, mixing until just combined.
5.  Fold in diced pears.
6.  Divide batter among muffin cups and bake 22-25 minutes, until golden brown.

Makes 12 muffins

* Alternatively, substitute 1/2c all purpose flour for whole wheat (so 1 c whole wheat flour and 1/2 c all purpose flour).
** You could probably cut this down to 1/2 c and these muffins would still be a sweet and tasty dessert!

My muffins are not generally sweet, so these dessert muffins have been a nice change from the ordinary!  I packed about half of them into the freezer so that I'll be able to enjoy them at their prime in the future when I'm looking for a quick and easy something sweet. 

I think I'll leave it there for today - we're leaving in the wee hours tonight/tomorrow to drive to Ottawa for my sister's wedding, and there's a bit more to be done between now and then.  It'll be a fantastic and busy weekend with Little Smiling Man as Ring Bearer, Mini Muffin as Flower Girl, and myself as Matron of Honour.  I'm really looking forward to it, as well as a bit of downtime afterwards! 

Monday, 30 May 2016

Savoury Mediterranean Pie

I am the first to admit that pastry is my baking nemesis.  Don't get me wrong, I love pie and even make some pretty delicious fillings.  But, I just can't seem to get pastry right; it falls apart, or it's too sticky, or it's crumbly, or it's tough.  I'm pretty sure that after each failed attempt I over compensate the next time, which results in the next pastry fail.  And so I'm completely reliant on my husband (or anyone else that happens to be around) to make pastry for me.

Yesterday morning my husband made me pastry for two, two crusted pies.  Hooray!  I'd been putting off making pies for a couple of weeks, and finally we found an opportunity for pastry making.  Funnily enough, I might as well have made the pastry myself in the end.  It was a very rare baking failure for him and was too fragile to roll.  Let's blame it on the humidity.  I forged ahead anyhow, hand pressing it together for the bottom crust, and doing my best to piece together the top crust.  My pies looked... rustic.  Sure... let's go with that!

By the time I was done I had two delicious pies cooling on the counter, and looking both odd and delicious at the same time.  The first was a tart and sweet pie with rhubarb fresh from the garden, and a tried and true Betty Crocker recipe.  The second was a savoury and quiche-like recipe that my mom has been making since I was a little kid.  Since I daresay it'll be a while before I attempt pastry again, this seems like the perfect time to share my favourite Sunday lunch - Mediterranean Pie.

Mediterranean Pie

Pastry for a two crust pie (uncooked)
8 oz Black Forest ham, thinly sliced
4-6 slices Swiss Cheese
1 tbsp butter
1 clove garlic, minced
1 small yellow onion, chopped
1 bag fresh spinach
1 red or yellow pepper
4 eggs

1.  Preheat oven to 375F.
2.  Lay bottom pastry in pie plate, and place ham over it in an even layer.  Top with cheese.
2.  In a frying pan, melt butter.  Sauté garlic and onion until onion is translucent.
4.  Add spinach to frying pan, and toss until wilted.  Transfer spinach to pie plate, in an even layer over the ham and cheese.
5.  Thinly slice red pepper and place in an even layer over the spinach.
6.  Lightly beat eggs, and pour over peppers.  Top with pie crust, cutting slits for steam to escape.
6.  Bake for 45-50 minutes, or until pastry is lightly browned. 

Serve warm; salad makes a great side.

Mediterranean Quiche
Cross-section - lots of yumminess between two crusts!

Today, happily there was leftover Mediterranean Pie for lunch, and rhubarb pie for dessert after supper!  A delicious treat on both counts!

Tuesday, 24 May 2016

Zucchini Pumpkin Quinoa Muffins

What a fantastic long weekend we had!  Having spent it working and playing outside, as well as getting a few things done inside, I came out of the weekend on an absolute high.  We had so much good quality family time, were active all weekend, and got so much done!

One of my less fun indoor tasks for the weekend was cleaning out the cabinet I use to store serving dishes, wine glasses and recipe books.  As I was going through my clutter of assorted recipe books and cooking magazines, I realized how nice it is that my focus in cooking hasn't changed much over the years.  I'm as much about tasty, simple and healthy food today as I was ten years ago.  This makes it really interesting to go through all of my recipes, as I tend to find forgotten, delicious gems.

The recipe I'm sharing today literally fell into my lap.  As in I was sitting on the floor, pulling down recipe books, and a recipe that I'd printed out years ago but never tried fell from the stack and landed in my lap.  When I read it and realized that it incorporated zucchini and a very ripe banana (of which I had one of each that needed to be used up) as well as quinoa (which I love), I knew it was meant to be.

Thanks to the footer on my print out, I was able to trace where it came from.  The Healthy Foodie created this recipe, and when I browse around their website they seem to have created many more tasty creations in the years since! 

Naturally, I put my own tweaks to it, and the result is perfect for little ones.  I find these muffins hearty and moist, and both lightly sweetened and spiced.  Best of all, they have no added sugar, lots of veg, and all the goodness of quinoa.  Quinoa is a grain that I'd really like my kids to eat more of, but I haven't had much luck at incorporating it into finger foods until now.  No matter how well formed and sturdy my efforts seemed to be, they end up disintegrating into a mess of individual grains as soon as little fingers grasp them.  Happily this recipe bucked that trend so I know it's possible.  If you have an awesome recipe for quinoa based finger foods, comment below please!  I'm interested!

In terms of sweetness, I kept my batch plain and found the flavours to be subtle but pleasant.  If you like your muffins a little sweeter or your flavor profiles more complex, consider adding a bit of maple syrup, raisins or both to your batter. 

Zucchini Pumpkin Quinoa Muffins
Zucchini Pumpkin Quinoa Muffins - fresh out of the oven

2c whole wheat flour
1 tsp gluten flour (optional)
1 1/2 tsp baking powder
1/2 tsp baking soda
2 tsp cinnamon
1/2 tsp ground ginger
1/4 tsp nutmeg 
1c zucchini, grated (about 1 medium zucchini)
1c pumpkin purée
1c cooked quinoa
1 large, very ripe banana
2 eggs
2/3c 2% milk

Optional:
1/3c raisins and/or 2tbsp maple syrup

1.  Preheat oven to 425F and line muffin tins.
2.  Blend first seven ingredients in a large bowl, set aside.
3.  Grate zucchini, and squeeze away excess water.*
4.  Combine zucchini, pumpkin and quinoa well.  Then, add well mashed banana, eggs and milk.  Include maple syrup in wet ingredients if desired.
5.  Pour zucchini mixture into bowl with dry ingredients and stir until just combined.  Add raisins if desired.
6.  Divide among muffin tins, and bake for five minutes at 425F.  Then, decrease temperature to 375F and bake another 17-20 minutes until lightly browned and an inserted toothpick comes out clean.
7.  Enjoy warm or cooled, they're lovely both ways!

Makes 16-18 muffins

* I've only recently come to appreciate the difference in final texture that squeezing moisture out of zucchini lends to my baked goods.  I simply transferred my grated zucchini to a clean tea towel, and squeezed it out over the sink.  It's amazing how much liquid a zucchini contains!

Little Smiling Man had one with dinner and his narrative was along the lines of "Harum, mum mum mum mum!", which I think means "Mmmm, mmm, mmmm"! 

Sunday, 15 May 2016

Easy Mommy Win - Apple, Broccoli, Green Bean Purée

As I've previously mentioned, my husband is spending weekdays out of town.  We survived our first week with the help of my mom, but I freely admit that I wasn't feeling like my usual organised and (somewhat) on top of things self!  With being away part of the weekend, I didn't have a chance to do my usual meal planning/grocery shopping/food prep routine.  Then, with my husband being out of town I really didn't have a chance to catch up.  While we ate very well thanks to my mom, I really noticed the difference in the extras - my work lunches, and breakfast and snacks for the kids.  For one, my stash of healthy muffins in the freezer ran out, and on Friday I realised that the kids didn't get as many veggies in as they normally would.  Cue the mommy guilt.

This weekend, I've been trying very hard to get back on top of things.  The washer and dryer have been going... and going... as have my steamer and oven.  My goal is to have a week of well planned, minimal prep dinners, and lots of good, nutritious foods for the kids and I to enjoy for breakfasts, lunches and snacks.  While I was looking for recipes I came across a Baby FoodE recipe I'd bookmarked but never tried.  Their recipe for Apple + Green Beans + Broccoli Purée is great - no tweaks required! 

Now, I have never had much luck with purées.  No matter how carefully I'd select delicious, fresh, local produce, steam to perfection, and purée them just so, my kids just never seemed to enjoy my purées.  Store bought baby food pouches, they'll suck back in the blink of an eye on the other hand.  I was taking it pretty personally... until I really looked at the ingredient list.  While I was buying products with things like broccoli, spinach and kale in the name, the veggies were actually not at the top of the ingredient list, so my kids were getting mostly fruits (and some veggies) when they'd polish one off.  So, I decided to get more creative with my purées, and take a cue from baby food manufacturers and incorporate more fruit.  In my searches to try and find the right balance between fruit and veg, this recipe came up, and I'm so glad I bookmarked it for future use! 

Green Applesauce
Apple, Broccoli and Green Bean Purée

2 sweet apples, peeled and chopped
1/2c broccoli flowerets
1/2c chopped green beans

1.  Place chopped apples, broccoli and green beans in a steamer and steam until tender.
2.  Purée to desired consistency, adding water from the steamer as required.  (I added 3/4 c water, and used my regular blender.)

Makes about two cups


This purée reminds me a bit of my Orange (Carrot) Applesauce, and both kids are really enjoying it.  For Mini Muffin, who as a toddler/preschooler is well out of purées, we've framed it as Green Applesauce, much like the Orange Applesauce she loves.  She was hesitant, but we got there in the end.  I'll call this one an easy mommy win, and seeing Mini Muffin actually consume broccoli and green beans makes it all the better!!!

Friday, 13 May 2016

Celebratory Sweet Potato Waffles

Today is Mini Muffin's third birthday!  Everyone says it, but while the days can be long, the years truly are short.  Suddenly my little first born baby has grown into a little girl who is more preschooler than toddler, and is absolutely beautiful both inside and out.  She makes me laugh every day and makes me want to be the best mom I can be.  She's full of love, energy, joy and wonder, and I hope those characteristics only grow stronger with age.

This morning she woke up with a big smile on her face; she's been asking if it's almost her "Happy Day" since July, so it's been a long time coming.  After I finished singing Happy Birthday, her first question was "Where's my cake?".  Luckily I'd thought ahead, and had a great alternative available for her... waffles for breakfast!

My husband makes waffles almost every weekend, usually with Mini Muffin as his helper.  His version involves stiff peaked egg whites to make them light and fluffy and oh so delicious.  While I love them, I don't love the effort and extra dishes their preparation entails.  So last night I set about making my own waffle recipe and included sweet potato.  I will admit that with my husband out of town and my mom (who was staying with us to help) having gone home yesterday, I felt like a superstar when I got the kids to bed, did all my cleaning/straightening while the sweet potato was steaming, prepped the wet and dry ingredients (so all I'd have to do was combine them and cook in the morning), and still got to bed in good time.  This morning, I got up 15 minutes early to make sure I had time to get both myself and the waffles organised before my early rising Little Smiling Man got up for the day.  It all came together perfectly, Little Smiling Man "slept in" and I managed to take the last waffle out of the iron just as Mini Muffin woke up.  Hooray!

My sweet potato waffles are quite dense and slightly sweet, and as such I found them very satisfying.  I even took a left over waffle with me to have as a snack at work - it was tasty even unheated and without toppings!  As an added bonus, the texture of these waffles stands up really well to little hands so they make a great finger food.

Sweet Potato Waffles
Healthy Waffles
Staying warm in the oven until the Birthday Girl awakes!


1c mashed sweet potato
1c 2% milk
1 egg
2 tbsp maple syrup
2 tbsp melted butter (optional)
1 1/2c all purpose flour*
2 tbsp baking powder
1 tsp cinnamon
1/4 tsp ginger
1/4 tsp nutmeg
pinch salt

1.  Peel, chop and steam sweet potato until soft.  Mash well, minimising lumps.
2.  Combine sweet potato, milk, egg, maple syrup and butter**.
3.   Blend remaining dry ingredients.
4.  Pour wet ingredients into dry and combine to form a thick batter.
5.  Grease waffle iron and cook.  I found a lower heat setting to give fully cooked and lightly browned waffles - setting 2 of 6 on my iron.
6.  Enjoy with butter and syrup, fruit and whipped cream, fruit sauce, or on their own!

Makes 6 waffles

* Whole wheat flour and a small amount of gluten flour could be substituted for white flour; I chose white flour because the sweet potato makes these waffles pretty dense as is.
** In my bleary eyed state this morning I completely forgot to add the butter I'd planned to include - the waffles turned out well without!

Mini Muffin was thrilled at surprise week day waffles!  After I topped them with butter and little bit of maple syrup, she tucked in and I held my breath hoping she wouldn't notice that they weren't "normal" waffles.  Her first response was "Mmmm... mmmm...."; music to my ears! And about four bites in she added:

Mini Muffin: "Did you put cinnamon?"
Mommy: "Yes, I did."
Mini Muffin: "Does Mommy's waffle have cinnamon?"
Mommy: "Yes, it does."
Mini Muffin: "We like cinnamon!" (smiles)

Healthy Waffles
Birthday Breakfast in Progress!
Sweet success to start my Friday morning.  I am one happy momma, and aptly so since as Mini Muffin says, a birthday is a "Happy Day".

Monday, 9 May 2016

Spasagne... and life just got a bit more complicated

We just had a total whirl wind weekend - a trip to my mom's place five hours away, my sister's bridal shower, a drive home immediately afterwards so that I could get up early to run on a marathon relay team with my coworkers, and then my husband heading back down south to start a new job.  Phew!  I think we'll all be using this week to recover.

My husband's new job is a pretty exciting prospect.  It'll put him working closer to home and with shorter working hours so he'll have more family time.  And it's in a field he loves - it couldn't be better!  The tough part (which is making life a bit more complicated) is that there's a long training period which will take him away from home Monday to Friday for months.  This week my mom is visiting to help out, which is amazing.  Absolutely amazing.  But, she won't always be here, so I'm all about finding ways to simplify everyday tasks and keep myself sane.

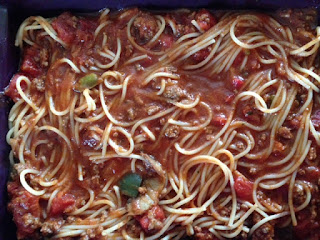
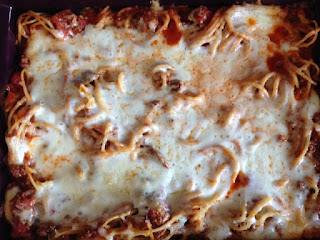
And so, I thought I'd share the dinner I prepared tonight.  I inadvertently invented and named it a couple of years ago, and it's been making regular appearances on our menu ever since.  Yesterday I found myself officially out of meal planning ideas, and decided to throw Spasagne in the mix as an easy option for a Monday.  I prepped it while the kids were munching on cheese, crackers and fruit yesterday afternoon, and today it just needed to be popped into the oven.  It was a delicious dinner, with almost no effort! 

So, I give you...

Spasagne (hint: it's a cross between spaghetti and lasagne)
Pasta Casserole
Pasta and Homemade Meat Sauce - just add cheese


1 family portion of spaghetti (cooked)
1 family portion of meat sauce
1/2 - 1 c grated mozzarella cheese
2 tbsp grated parmesan cheese

1.  Cook spaghetti to al dente consistency.  Note that whole wheat pasta is not appropriate for this recipe, as it tends to lose texture.  We use 'Smart' brand pasta and it works well.
2.  Combine meat sauce and cooked pasta.
3.  Transfer into casserole dish and top with cheeses.
4.  Cover and bake at 350F until heated through and bubbly.  Let rest five minutes, cut into square slices and serve.

Note - To make ahead, follow steps 1-3, then refrigerate overnight. 

Pasta casserole
Hot from the oven and ready to enjoy!
And, in the spirit of keeping things simple, here's a short list of what I love about Spasagne:
1.  It's quick and easy.
2.  It incorporates the cheesy goodness of lasagne, without the fuss of layering pasta and sauce.
3.  I can make it with the homemade meat sauce that I have in my freezer, so it's a weeknight, home cooked meal ready in no time.
4.  I can sneak extra veggies into it via the sauce; kids will probably be too distracted by the cheesy goodness to even notice.
5.  My family loves it.  My mom even went back for seconds tonight, and that never happens!   

Wednesday, 27 April 2016

Shrek Juice

Today we practiced what seems to have become a weekly ritual.  Today was our official try-to-sneak-green-food-into-your-strong-willed-and-picky-toddler day.  So far I've been having the most success with putting greens into beverage form, and have previously posted about some of our favourites (Shamrock Mock-shake and "Chocolate" Thick Shake).  This time, I decided to revisit a favourite of Mini Muffin's that I haven't made for a few months; Shrek Juice.

Green Smoothie
Gloriously Green - Shrek Juice!
The recipe for Shrek Juice came from Homemade Smoothies for Mother and Baby by Kristine Miles, that my husband picked up for me on a whim at the grocery store about a year ago.  It's been the source of a couple of good ideas for kid friendly smoothies, a few good mama smoothies and, well, a few flops along the way.  From those we've tried, Shrek Juice is a definite gem!

So, without further delay -

Shrek Juice

1 1/2 c coconut water
Large handful of baby spinach
2 dates
1/2 avocado
1 ripe banana
Ice

1.  Soak dates to soften.  I like soaking them overnight to get them as soft as possible.
2.  Add spinach, then dates, then coconut water to blender.  Blend well (no chunks should remain).
3.  Add banana and avocado, blending until smooth.
4.  Add ice, blend and enjoy!

I find this smoothie to be very well suited to the toddler/preschooler pallet.  The banana and avocado make it creamy, the banana and dates make it naturally sweet, and the banana flavour does a great job at hiding the taste of all the other ingredients.  And of course it's a wonderful shade of green that could only be favoured by ogres!  I also like that it gives Mini Muffin healthy fats from the avocado, electrolytes from the coconut water and of course a good helping of spinach! 

Since it's been a while since I've made it, today was Little Smiling Man's first Shrek Juice experience.  He's not as tough a customer to please as his sister, but he greeted it pretty enthusiastically and screeched for some of mine as well.  Mini Muffin eyed it up, then she eyed me up, then conceded to try a sip.  Happily, that sip turned into her drinking her cup.  I think Shrek Juice is officially back in my rotation!

Monday, 25 April 2016

Whole Wheat Carrot Muffins - A Hit!

A couple of months ago I started cleaning my fridge out every Friday.  It's made a huge difference; reducing fridge clutter and food waste simultaneously.  It gives me a good view of what I have, what I need, and what I need to use up in the very near future.

This past week, I realised that a jar of unsweetened applesauce had been open for a while, and needed to be consumed quickly.  Instead of trying to feed my kids a lot more applesauce than normal, I thought I'd turn it into muffins.  My quick recipe search was uninspiring; oatmeal applesauce muffins galore.  Then, I found a fantastic recipe for whole wheat carrot muffins at 100 Days of Real Food.  Now this was a recipe I could work with!

So, after a few tweaks to meet my family's tastes, here's my version:

Whole Wheat Carrot Muffins

Carrot appleasauce muffin
Still warm and ready to be enjoyed!
1 1/2c whole wheat flour
1 tsp gluten flour (optional)*
1 tsp baking soda
1 1/2 tsp cinnamon
1/2 tsp ginger
pinch of salt
1/2 c butter, melted
1/3 c honey
1 egg
1 tsp vanilla
1 c unsweetened applesauce
1 c grated carrots


1.  Preheat oven to 350F and prepare muffin tin (grease or use muffin cup papers).
2.  Combine whole wheat flour, gluten flour, baking soda, cinnamon, ginger and salt. Mix well.
3.  Add grated carrots and mix until carrots are coated.  Create a well to receive wet ingredients.
4.  In a small bowl, combine butter, honey, egg, vanilla and applesauce.
5.  Add wet mixture to the well in the dry ingredients.  Stir until just combined.
6.  Divide among muffin cups and bake 22 - 24 minutes.

Yields 12 muffins

* Gluten flour is an optional ingredient and was not included in the original recipe.  I find adding a bit of gluten flour to whole wheat baked goods results in a more tender texture.  Essentially you get all the goodness of the whole wheat flour without the toughness it sometimes yields.  Gluten flour is available in bulk stores, as well as in the health food section of many grocery stores.

I am so pleased with how these muffins turned out - I will absolutely be making them again!  They're moist, lightly sweet, and have quite a delicate crumb.  Mini Muffin ate an entire one with gusto for her "sert" (aka dessert) last night.  And while each muffin only contains just over a tablespoon of grated carrot, I'm in full support of any extra little bit of veggies that my kids can eat - and enjoy!

Wednesday, 20 April 2016

Simple Kitchen Sink Quiche

When I’m home with the kids our daily routine sometimes seems to revolve around food – breakfast, morning snack, lunch, afternoon snack, dinner – and everything else needs to fit into the gaps.  With the responsibility of nourishing small, growing people my own eating habits have definitely shifted.  I eat more fruits and vegetables, fewer processed foods, and certainly eat more regularly than I once did. 

Since my return to work some additional changes in my eating patterns have been necessary.  On a work day, I’ve generally finished my breakfast by 5:30 (as opposed to the leisurely 8:00 I enjoy when at home).  With nearly six hours between breakfast and lunch, a morning snack is more of a necessity than ever!  And, let’s call a spade a spade; because my morning is so long, my morning snack is more like a small meal than a quick bite.  With that in mind, I’ve been trying to make sure my morning snack is a) enjoyable, b) varied from day to day, and c) packs a nutritional punch.
This morning I snapped a picture of my morning snack since it was looking so good, and thought I’d share the recipe!  This quiche can be whatever you want it to be; mine changes every time based on what I have in the fridge and want to use up!  It’s simple and quick to make, can help to reduce food wastage, and as I’ve learned this week makes a great snack or meal for young children and mamas alike!

Easy Quiche
Simple Crustless Kitchen Sink Quiche
4 eggs
1c 2% milk
1c self raising flour
1 medium zucchini*
2-3c of other veggies, meat and cheese, finely chopped or grated** 

1.        Preheat oven to 350F, and grease a casserole dish or baking pan (approx 10” square).
2.       Grate zucchini and combine with other finely chopped or grated ingredients.
3.       Add self rising flour and mix well.
4.       In a small bowl, whisk eggs and milk.
5.       Add eggs and milk to zucchini mixture and stir until just combined.
6.       Transfer to prepared pan and bake until firm in the middle and lightly browned around the edges; approximately 40 minutes.  Time will vary based on size of pan and thickness of quiche. 
* Grated zucchini is a key ingredient for this dish – it gives the quiche its final texture and helps hold it together.  I do not recommend omitting zucchini from this recipe.
** You can plan this quiche (e.g. broccoli and cheese), or use it as a kitchen sink dish to use up odds and ends in your fridge like I do.  The quiche pictured contains – 1 zucchini, 1 carrot, 1 seeded tomato, 2 green onions, handful of leftover cooked broccoli and corn, cheddar cheese and peameal bacon.
To dress your quiche up, consider laying asparagus spears or tomato slices on the top before baking.  A quick spray with a non-stick cooking spray or oil atomizer will also help brown the top.
Little Smiling Man and I have been enjoying this quiche for a couple of days now.  It’s quick and easy to add to his dinner, and he really seems to enjoy it.  Plus, it's firm enough for little fingers to pick up easily, yet still soft enough to be easily eaten before any molars come in.  I’ve had it both as a packed lunch with a side of spinach, or on its own as a snack.  It holds its shape well, and reheats nicely, so it’s a great work day dish!
Enjoy!

Monday, 18 April 2016

Pumpkin Oatmeal Cookies for Baby

As I was getting ready to return to work, in addition to my flurry of preparing freezer meals, I worked on finding easy, freezable, wholesome finger foods I could make for the kids.  My vision was to have foods, preferably containing some form of vegetable, ready to go in the freezer so that when my hungry littles got home I could put something in their hands to help them wait until dinner's ready.

The first baked creation I tried was a tweaked version of Pumpkin Pie Chocolate Chip Oatmeal Cookies from Amy's Healthy BakingIt came highly recommended from an online forum I frequent, so I had to give it a try.  The original recipe looks absolutely delicious for grown ups, but for my kids I did need to tweak it a bit.  The end result was a moist and flavourful cookie that Little Smiling Man devoured each and every time I handed him one!  I definitely ate my fair share of them too, and I may or may not have had some breakfast at some point before they ran out...

So without further ado -

Pumpkin Oatmeal Cookies for Baby
Baby Cookies
Soft and delicious Pumpkin Oatmeal Cookies

1c instant oats
3/4c whole wheat flour
1 1/2 tsp baking powder
2 tsp cinnamon
1/4 tsp ginger
1/4 tsp nutmeg
pinch salt
3/4c pumpkin purée
1/4c maple syrup
2 tbsp melted butter
1 tsp vanilla extract
1/4c raisins

1.  Preheat oven to 325F
2.  Blend dry ingredients in a medium sized bowl, created a well in the middle.
3.  Combine pumpkin, maple syrup, butter and vanilla.  Pour into dry ingredients and stir until just combined. 
4.  Add raisins, and mix until well distributed.
5. Spoon onto parchment lined cookie sheet.  Using a spoon, press down and form cookies.  These cookies do not spread at all during baking, so form the cookies however you'd like the final product to look.  I used a cookie-sized ice cream scoop to get the volume and round shape I was looking for, then just pressed them down.
6.  Bake 12-14 minutes.  The cookies should still be soft, and slightly browned on the bottom.  Cool on pan for a few minutes before transferring to a rack.

Makes 18 large cookies

Among the many things I like about this recipe (aside from the cookies of which I ate quite a few myself!) is that it gets its sweetness from raisins and a bit of maple syrup as opposed to large quantities of added sugar.  I also like that they work well with whole wheat flour, and have a healthy portion of pumpkin in them.  All in all, they're a well rounded cookie, and did I mention that they're delicious?   

Thursday, 14 April 2016

Healthy "Chocolate Thick Shake"

I had a major mommy win last night. Since shortly before my return to work, Mini Muffin has been kicking the picky eating up a notch.  A lot of it, I think, is around the changes in our routine and that's leading to her retesting boundaries and trying to exert control over what she can - in this case whether or not she eats.  It's been a huge struggle as she's been rejecting foods she loves, and generally eating like a bird, which in turn makes her cranky, and well, you know the drill.

One of the significant challenges I've had are vegetables.  I've been struggling to get any form of veggie into her, and it's so frustrating!  Last night I tried something new, and was so happy that it worked!  I found a recipe in a smoothie cookbook I have, gave it some pretty significant tweaks, and the result was a "chocolate thick shake" that when served in a coloured straw cup to hide the green tinge, went down like a treat!  Mini Muffin of course has no idea what a thick shake is, so took to calling it her chocolate drink.

Mini Muffin's Special Chocolate Drink

Large handful of baby spinach
1/2 med or 1/4 large ripe avocado
1 1/2 c coconut milk
1 banana
2 tsp cocoa powder
1 tsp honey
1/2 tsp cinnamon
Ice

1.  Add spinach, avocado and coconut milk to blender, and blend until smooth.
2.  Add banana, cocoa powder, honey and cinnamon.  Blend until smooth.
3.  Add ice, and blend.  Adjust consistency with extra avocado and/or ice to make thicker, or extra milk to make thinner if desired.

Makes two servings. 

I made and served this drink while Mini Muffin was out of the room, since it does have a bit of an odd colour to it.  However, once she tasted it, she was pretty intent that it was all hers!  She drank about half of the recipe (so a big glass full), and Little Smiling Man and I split the rest.

I totally did a happy dance behind her back as she slurped it back!


Friday, 18 March 2016

Creamy Cauliflower (fake potato) Salad

Confession time - I have never really liked potato salad.  I'll pause to let the gasps die down and this tidbit settle in.  It's not that I don't like the taste, it's more a texture thing with boiled potatoes for me.  Sometimes the store bought varieties are okay, but let's face it, who knows what's in those!

Last weekend when we fired up the bbq, the thought of potato salad came back.  My husband has been eyeing it up in the grocery store, and now that we're grilling again I know it's high on his cravings list.  Luckily, I was recently chatting with a  mommy friend about kids and veggies, and she mentioned that the only way she could get her family to eat cauliflower was via a mock potato salad recipe.  And with that, the seed was planted and the hunt for a delicious recipe was on!

I must say, the first few recipes I came across did not appeal to me.  Lots of ingredients and they looked too complex to make while distracted by kidlets running amuck.  Then, I found the recipe below at Buns in My Oven, and had to give it a try.   

Creamy Cauliflower (fake potato) Salad


1 head cauliflower
2 hard boiled eggs
1/3 c mayo
1 tbsp prepared yellow mustard
1 tbsp relish
2 tsp finely chopped onions
1 tsp dill
1 tsp chives
1 tsp white vinegar
1/2 tsp each salt and pepper

1.  Prepare cauliflower by washing and cutting into bite sized (or slightly smaller) pieces.
2.  Steam until tender crisp, then refrigerate. 
3.  Combine chopped hard boiled eggs and cauliflower.
4.  Combine remaining ingredients and fold into cauliflower and egg mixture.
5.  Chill and serve.

What drew me to this recipe was the comment that it tastes like potato salad, but has a slightly different texture.  Perfect for me, and I can confirm 100% true!  I love this salad, and there were no tweaks required from the original recipe (other than that I used dried dill instead of fresh because it was what I had on hand).  The best part is that I feel good about feeding it to my family.  It's a great side for a sandwich, a burger, or to take on a picnic.  And, it's a great way to get a little more cauliflower into your diet.  Enjoy, and happy grilling! 

Tuesday, 15 March 2016

Simply Delicious - Healthy Shamrock Mock-Shake

It's been quite the week!  Little Smiling Man turned one over the weekend!!!  I'm still not even sure how that's possible, time is going so quickly.  We had a nice time celebrating as a family, and tomorrow are having some extended family for a visit to celebrate.  He's taking some early, tentative steps, is babbling up a storm and is into everything.  He really is awesome.

At the same time, my maternity leave is rapidly drawing to a close, so our days at the moment are chocked full of appointments.  Mini Muffin had a very successful dental check up, Little Smiling Man will be going to his 12 month well baby check up, and I'm also due for the dentist and a trip to the bank to talk mortgages.  Busy times!

Spring is also upon us, which is drawing me back to summery things... like smoothies.  Mini Muffin hasn't been doing very well with her veggies lately, so I've been trying to get more innovative.  And so, today I'm sharing our long standing favourite Shamrock Mock-Shake.  Kinda timely with St Patrick's Day around the corner as well!  Super easy, and definitely toddler and preschooler approved.  Due to the presence of honey, this recipe is not appropriate for babies under one year.

Healthy Shamrock Mock-Shake
Perfect Afternoon Snack!


1 large handful of baby spinach
1 1/2 cups milk of choice (we use almond milk)
1 small (or 1/2 medium) ripe avocado
1/2 tsp vanilla extract
1/2 tsp peppermint extract
honey (to taste)
ice

1.  In blender, add spinach then pour milk over top.  Blend until no spinach chunks remain.
2.  Add remaining ingredients, except ice, and blend. 
3.  Add ice and blend until smooth.  Serve immediately.

And just like that, both you and your littles can enjoy a seasonal, refreshing and creamy smoothie complete with a good dose of spinach and healthy fats from avocado.  And, I must say, it makes a great afternoon snack!

Thursday, 3 March 2016

Easy Win - Three Food Group Oatmeal Breakfast for Baby

After a difficult February, including the devastating first trimester loss of Little Smiling Man's precious little sibling, March has arrived with all of us on a more even keel.

Yesterday, I spent some time in my favourite baby cookbook - "Better Baby Food" by Kalnins and Saab, looking for inspiration to help dig Little Smiling Man out of his toast-with-Laughing-Cow-cheese-for-breakfast-food-rut.  I did find inspiration and made it my own, and so I'm happy to share with you my easy, healthy, three food group oatmeal breakfast for baby!  I love slipping veggies in unexpected places like breakfast or dessert, so this breakfast features veggies, dairy and grains.

Three Food Group Oatmeal Baby Breakfast

1/4 c quick cook oats
1/2 c 2% or homo milk
1/4 - 1/3 c roasted butternut squash, mashed

1.  Combine oats and milk in a small saucepan.
2.  Bring to a boil on medium-high heat, reduce heat to simmer.
3.  Cook until thickened, about three minutes.
4.  Add well mashed squash.
5.  Allow oatmeal to cool to baby temperature, and serve.

Makes 2-3 baby servings.  Appropriate for babies 8 months and older.  To reheat, add a little more milk to maintain texture.


Veggie Oatmeal
Three Food Group Oatmeal Baby Breakfast
That's it!  Super easy, and a healthy way to start the day, or finish off dinner.  Little Smiling Man is a fan, and I'm a fan of getting a head start on our daily veggie quota.  In future we'll try mixing it up, maybe trying sweet potatoes or carrots.  But for now, aside from having to deal with clean up of a little boy with oatmeal plastered in his hair, I'd say this low effort meal is an easy win!

Wednesday, 10 February 2016

Simply Delicious - Fruity Oatmeal Bites

Little Smiling Man has seriously been enjoying raspberries this week.  It's the first time in a couple of months that we've had them on hand, and he will truly eat as many as I give him.  He just can't seem to get enough!

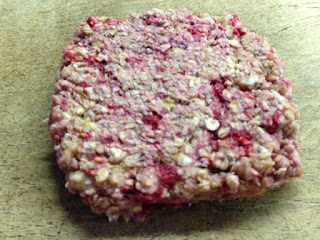
This morning, I decided to make a quick and easy breakfast I haven't made in ages and that Little Smiling Man has actually never had before (and would give him that raspberry taste he loves so much)!  I originally came across this recipe on an online forum focused on babies, as an idea for baby finger foods, and have made it many times since.  It's a fun way for babies and toddlers to enjoy their oatmeal, and makes a nice change from the usual cereal, bowl of oatmeal or toast.  It also makes an easy breakfast or snack on the go since it's a non-sticky finger food.  Enjoy!

Fruity Oatmeal Bites
Banana Oatmeal Bites
Cooked bites, after being transferred from plate.


1/2 banana
5 raspberries (approx.)
1/4 cup quick cook oats

1.  Thoroughly mash banana and raspberries.  The banana should be mashed until the point that it's pretty much smooth.
2.  Mix in oats, making sure that they're thoroughly coated with banana.
3.  Transfer to a plate, forming the mixture into a square.
4.  Microwave on high, for approximately three minutes.  You're looking for the oatmeal to be held together enough to lift off the plate as a square, but still soft enough for little ones to enjoy.  If it's undercooked it will be too soft to transfer off the plate, and if it's over cooked it gets very chewy/hard as it cools.  It may take a few times to find the right time for your microwave.
5.  Cut into bite sized pieces and serve once cool enough.


Banana Oatmeal Bites
Ready for little fingers!
The final verdict?  Little Smiling Man thought it was fantastic and gobbled the whole thing up.  I suppose it's not really surprising since bananas and raspberries are two of his favourite things!  I suspect that I'll be making this one for him many times in the future.  We may also start experimenting with a few variations, like adding some nut butter for protein, or using different berries.  So many possibilities.... 
     

Saturday, 23 January 2016

Simply Delicious - Avocado Toast

The recipes I share are normally designed with my kidlets in mind, but today I thought I'd share an easy grown up recipe that could be tweaked for kids if you so desire. Sometimes Mama (or Daddy!) needs a quick, easy and satisfying bite, and this is my quick fuel obsession of the moment - avocado toast!

If you haven't previously been introduced to the deliciousness that is avocado toast, give it a quick google and you'll find dozens of mouthwatering pictures and recipes. It's simple, versatile, and well, have I mentioned how delicious it is?

Avocado Toast with a Guacamole Twist

1 slice crusty whole grain bread, toasted
1/2 small ripe avocado (or 1/4-1/3 of a large avocado)
1 tbsp chopped cilantro
2 tbsp cooked corn
2 tbsp chopped tomatoes
Squeeze of lime juice
Salt and pepper to taste

1. Mash avocado until spreadable but still a bit lumpy.
2. Add lime juice and cilantro; stir to combine.
3. Add corn and tomatoes, mixing until coated.
4. Spread on toast and season with salt and pepper.

Avocado Toast (with a guacamole twist!)... mmmm.....
That's it! Adjusting the toppings to your taste, mood and the contents of your fridge results in endless combinations. The carbs and healthy fats will keep you going. And, your taste buds will thank you!

Simply delicious!

Friday, 15 January 2016

Homemade All Purpose Cleaner

Ever since Little Smiling Man started enjoying solids as part of his diet four months ago, kitchen cleanliness has been a challenge.  He adores his food, and while he's getting neater, he still eats a bit like a Muppet with lots going into his mouth and lots coming back out.  Imagine Cookie Monster in a highchair next to your kitchen table, and then imagine what cleaning up after his meal would look like.  That is my reality.  Three times a day.  His hands, face, bib, clothing and highchair are soon coated in whatever he's eating (be it from a spoon or a finger food).  And just for good measure he likes reaching over and spreading it anywhere on the kitchen table that he can reach.  Clean up after meals involves a thorough wipe down of his highchair, his tray, the table, and sweeping and mopping the floor.  Then there are the messes that Mini Muffin makes; putting her food directly on the table because Little Smiling Man's food isn't on a plate either, toppled cups or spills from her spoon.  I think it's suffice to say that a quick swish with a dishcloth simply does not cut it for these kind of messes!

Luckily, I came across a recipe for a homemade all purpose cleaner (that isn't a chemical cocktail) on a blog I enjoy - Nashville Wife.  I gave it a try and found it to be very effective; great and cleaning and free of residue!  It cuts through all kinds of messes with ease; yogurt, grease, mashed fruit, and some messes I can't even decide how to describe.  I have made three batches so far, and I'm especially happy with my latest batch.  I think this time I got my recipe tweaks just right, so I wanted to share!  For your reference, the original recipe is here.

Homemade All Purpose Cleaner

1 part white vinegar
3 parts water
squirt dish soap
10 drops essential oil of choice per cup of solution

1.  Add vinegar and water to an empty spray bottle; I use a 1L bottle, so use 1 cup vinegar and 3 cups water.
2.  Add a good squirt or two of dish soap; I use the classic blue Dawn.
3.  Add essential oil; 40 drops for 4 cups of solution.  Lemon essential oil is my personal favourite, but you can find a wide variety of essential oils at health food stores.
4.  Seal, shake and use!  I give the solution a little shake before each use because the oil separates and I like an equal amount of lemony freshness throughout the batch!

The heavy lifter in this mixture is of course the vinegar, also known as acetic acid. It's been a staple for home cleaning for more years than I can imagine, and for very good reason. It's a powerful cleaner, cuts grease, and is even a disinfectant. In other words, it's fantastic for keeping kitchen surfaces clean and free of E.coli, salmonella and other common bacteria like pneumonia according to David Suzuki. The essential oil is basically for scent, but depending on which you choose (for example, tea tree oil) you can even up the antibacterial power of your cleaner with those scent filled drops.  Finally, the dish soap is there for a little more cleaning and grease cutting muscle.

I really enjoy that I know exactly what I'm spraying on my little man's highchair and eating surfaces, as well as around the kitchen.  And equally importantly, I find it works really well... even when it's a few hours before I get back to some of those caked on messes.  I hope you too can find this recipe a good way to reduce chemicals in your home, while keeping it shiny and clean.  As I think you can gather, I'm so happy that I came across that blog post and added this homemade cleaner to my everyday cleaning arsenal!

Tuesday, 12 January 2016

Simply Delicious - Vegg'ed Up Pizza Sauce

Like so many little kids, Mini Muffin adores pizza.  With this in mind, we found ourselves making pizza over the weekend.  It's a fun family activity that Mini Muffin loves to help with - making the whole wheat dough, spreading the sauce and sprinkling it with cheese and pepperoni.  Of course I love my pizza with lots of veggies, but in her world pizza is only pizza if it's plain pepperoni pizza.  Sigh.

So, I made my sneaky vegg'ed up pizza sauce.  This is the second time I've made it, and the second time I've forgotten to take pictures!  It's also the second time that Mini Muffin has loved it.  It's super simple and easy, and is a great way to sneak a few veggies onto plain pepperoni pizza!

Vegg'ed Up Pizza Sauce

1/3 red bell pepper
1 medium carrot
1 small zucchini
1 - 1.5 c of your favourite pasta sauce

1.  Coarsely chop all veggies, and steam until soft.
2.  Purée steamed veggies and pasta sauce.
3.  Spread on pizza and enjoy the veggie goodness!

It makes me giggle that Mini Muffin, both times, has watched me cram as many veggies as possible into the pizza sauce, yet doesn't seem to register that there are extra veggies in there!  Both times, she's watched me whirl the sauce smooth, and asked me to taste.  After giving her a dipped spoon to lick, she has decided that she needs more.  So, on both occasions she's eaten a small prep bowl of vegg'ed up pizza sauce while we prep our pizza.  I suspect she enjoys it because the texture is nice and smooth, and the red bell pepper makes it nice and sweet. 

But whatever the reason, I call it a win for Mama!